How to Migrate Users in Feltiv

Migrate Team Member feature is built for scenarios where you want to invite a team member with an email-id in your team, but the team-member has already signed-up on Feltiv with the same email-id as a separate account. This feature helps you bring that user into your Enterprise Account.

This feature is available for account type: Localisation Agency or Customer.
[[TO VERIFY - "Localisation Service Firm" was renamed to "Localisation Agency" to match the vendor sign-up wizard. Confirm this feature is still available to these account types. Delete this line afterwards.]]
Company Admins can easily migrate their existing team members from one Feltiv account to another using the built-in user management tools. To begin the migration process, simply access the 'Settings' icon in the top right corner and navigate to the 'Teams' menu. From here, you can manage your team members in company account along with their roles.
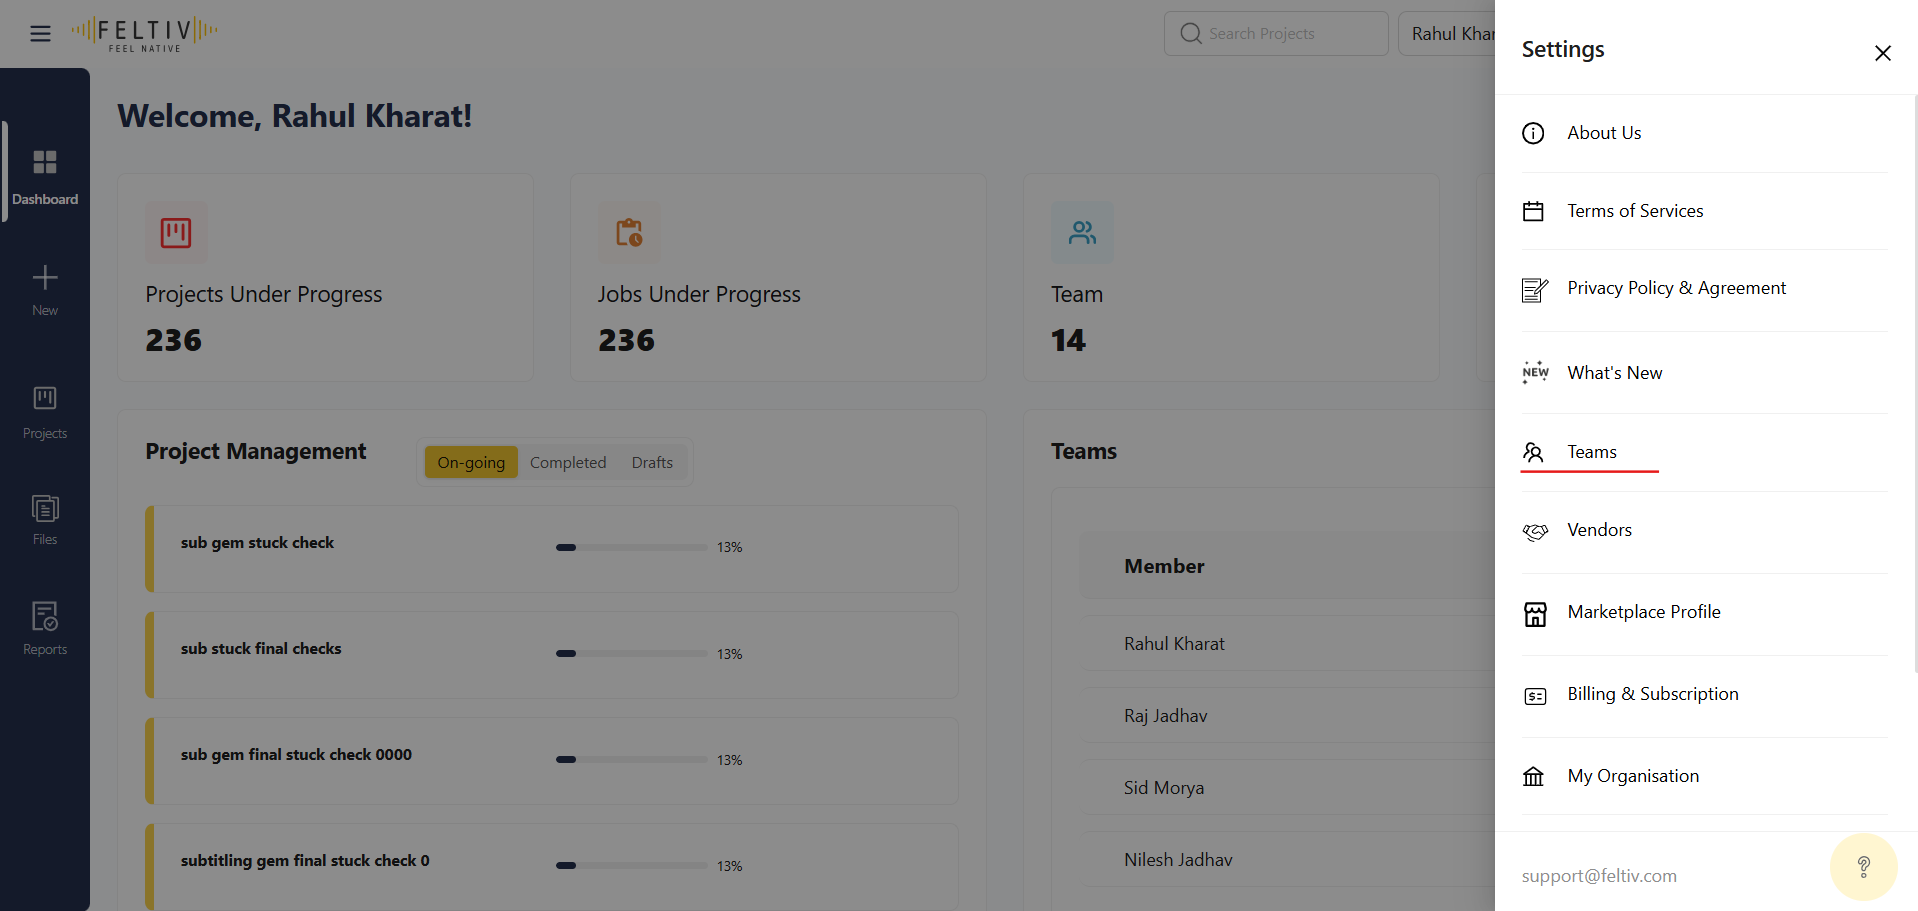
In the Team Management section, you'll find a comprehensive overview of your team's composition and status. This includes sections for Invited, Active, and Inactive members, allowing you to easily monitor and manage your team's access.
Within each section, you can quickly search for members by their first or last names, facilitating efficient navigation. Each member entry displays key information such as their name, email address, and mobile number.
If you wish to migrate a team member's account into your current Company account, simply click on the 'Migrate Member' button located in the top right corner.
After clicking the 'Migrate Member' button, a card will open where you can enter the email of the user you want to migrate.
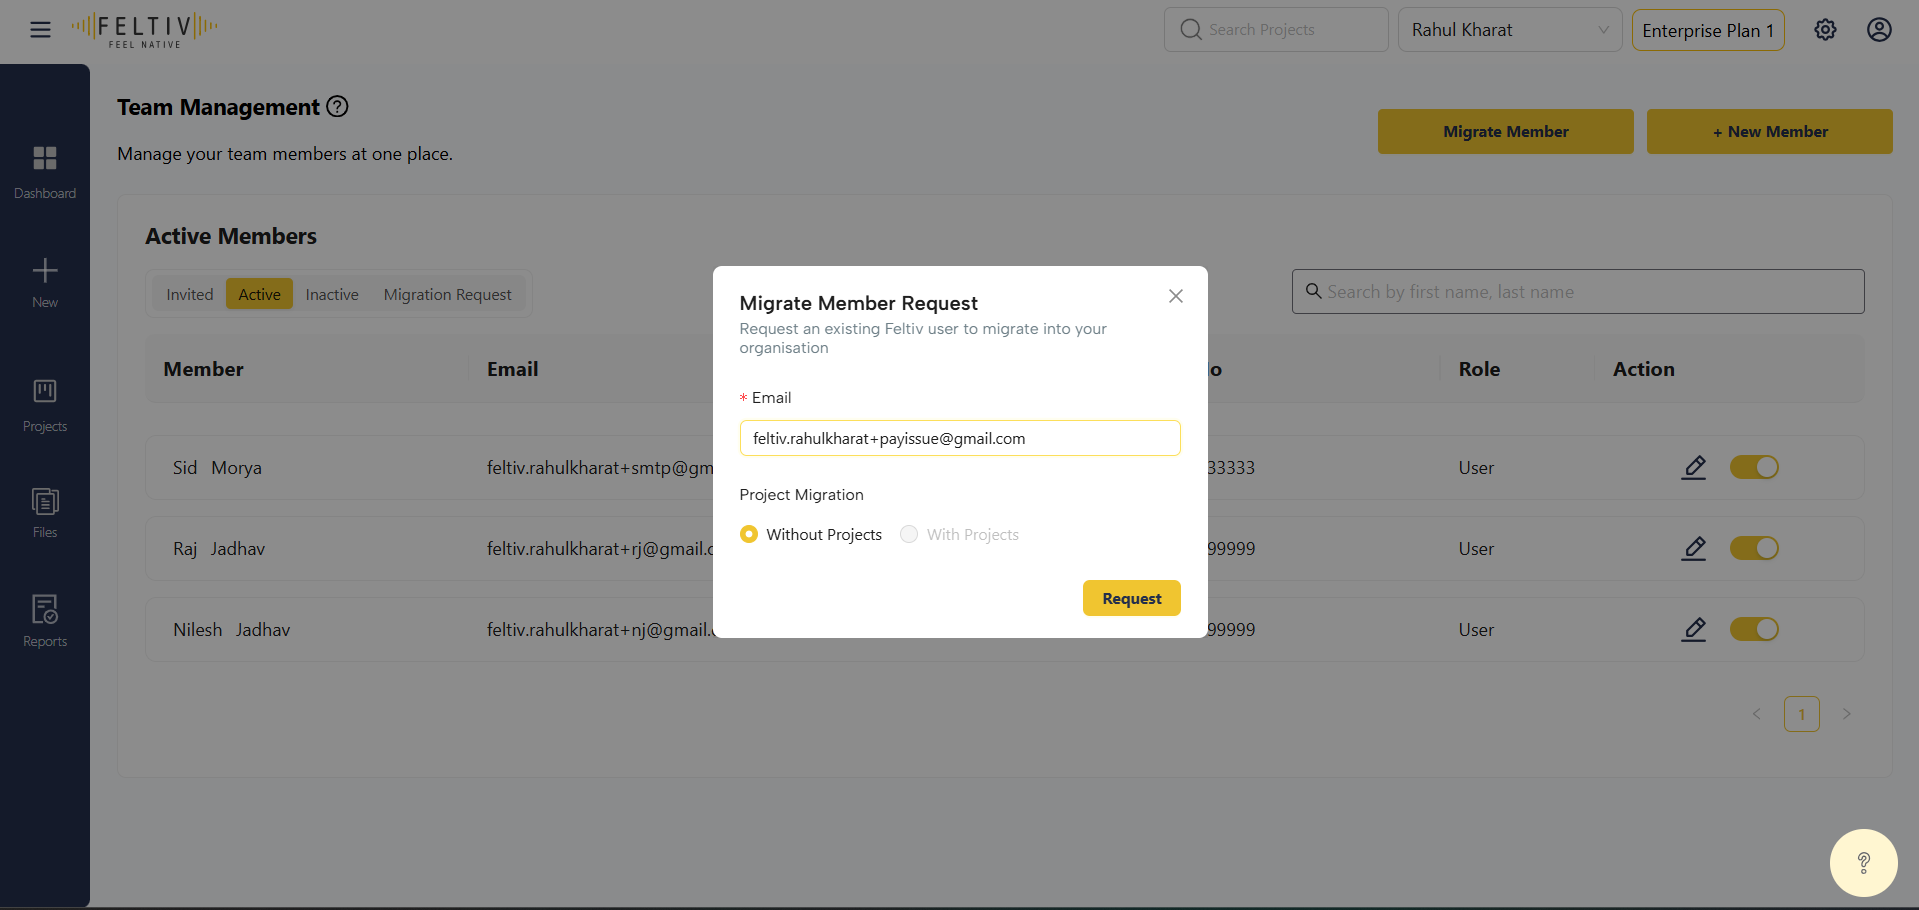
Here, you can enter the email of the user you want to migrate and click on 'Request' button.
Here, you can enter the email of the user you want to migrate and click on 'Request' button.
The user that is being migrated needs to be with an Individual Creator or Individual Artist/Freelancer account. If you are facing while sending migration request, please contact support for assistance.
[[TO VERIFY - "Individual Artist/Freelancer" is probably now "Freelance Localisation Expert", but the wording was left as it is because this sentence is about the account type of the migrated user. Also confirm whether "Individual Creator" still exists. Delete this line afterwards.]]

Migration of users is currently only available without migration of their projects.
[[TO VERIFY - a product owner must confirm this is still true (migration without projects). Delete this line afterwards.]]
Once the request is sent, you can view its status under the ‘Migration Requests’ section.
Now, the user who is being migrated needs to proceed with the next steps. They must click the ‘Take Action’  button in the migration invite email they received, while they are logged in to their account.
After clicking the ‘Take Action’ button, the user will be redirected to the Migration Request page, where they can view the details of the request, including:
- Requestor Email
- Requested On
- Status
- Accept and Reject buttons
The user must click on the ‘Accept’ button to proceed. Once accepted, the user will be successfully migrated into that entity.
Related articles
- How to Accept a Migration Request (for the user who receives the migration request)